
Using Manuskript to Write a Fiction Novel
Summary
This tutorial describes how to get started using Manuskript software to write a fiction novel.
Several features are covered that can be useful to both plotters (those who like to plan before writing) and pantsers (those who like to fly by the seat of their pants and dive right into writing). At the end of the tutorial you should have sufficient knowledge to use Manuskript to craft your novel.
This tutorial does not tell you how to come up with a story idea and craft it into a best-selling book with intriguing plots and devious characters. No, that creative endeavour is up to you. Manuskript is a tool like a writer's pen and paper that additionally can help you stay organized while you follow your writing passion.

Manuskript runs on GNU/Linux, Windows, and Mac OS X.
The tutorial was written using Manuskript version 0.5.0 but should be useful for newer versions too.
Contents
- Introduction
- Install Software
- Getting Started
- Outline
- Characters
- Settings
- Labels
- Editor
- Compile and Export
- Tips
- Conclusion
- References
Introduction
Writing a fiction novel is a significant undertaking. There are characters to be created, plots and conflicts to be resolved, and in the end a story to be told. Manuskript software can help you stay organized and keep track of the details.
The most important goal for a writer is to capture her story with the written word. This goal can get lost in non-essential tasks such as learning all the features of various pieces of software. While this extensive learning can be useful, it is a distraction from the reason why writers decide to write a novel. And that reason is to tell a story.
A famous author once told me "All you need to write a novel is a cheap laptop and a text editor. The rest is all distractions."
Manuskript lets you focus on telling your story. It does this with MarkDown plain text format, ignoring finicky details such as typeset formatting. All you need to know for formatting is:
- Separate paragraphs with a blank empty line.
- If italic emphasis is needed then place a single asterisk around a group of words. For example to indicate a character's *inner thoughts*.
Without further ado let's get started.
Install Software
First you will need Manuskript installed on your computer.
Follow the installation and invocation instructions from the Manuskript Wiki.
|
Caution: Create Backups Often |
Next let's learn how to use the software.
Getting Started
When you invoke Manuskript a welcome screen is displayed.

For simplicity, choose the Novel template, click Create, and select a folder and name for your novel.
Don't worry about the number of chapters or scenes. More can be created later as needed, and any extras can be deleted.
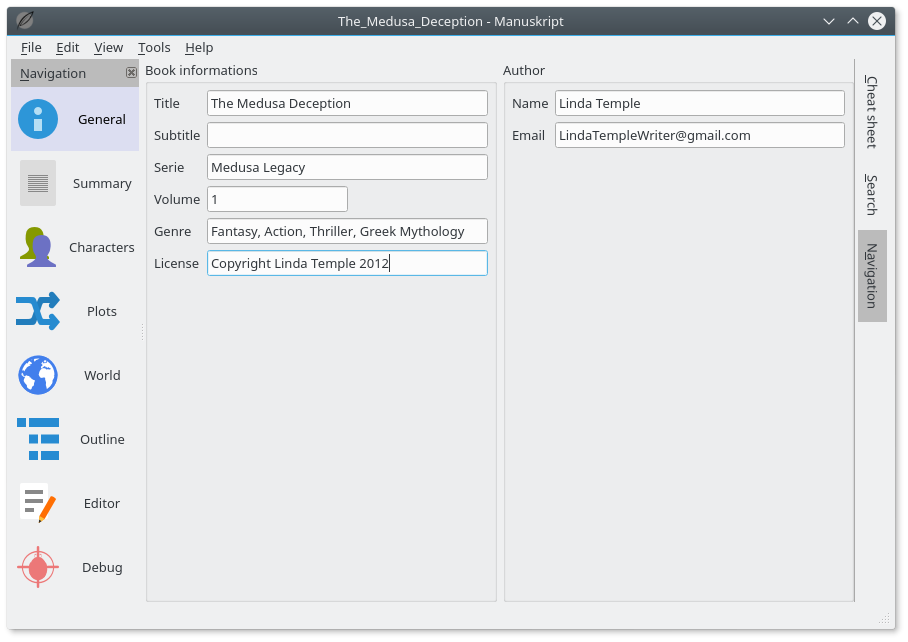
Pantser
If you are a pantser and want to get started writing your novel right away, then click on the Editor icon on the left-hand-side, select Chapter 1 - Scene 1 in the project tree, and start writing. You can return to the tutorial later.
Note that by default manuskript automatically saves your work so no need to worry about manually saving as you type.
Plotter
If you are a plotter, then the following outline section will be of interest to you.
Outline
The Outline pane enables you to create, rename, and delete chapters and scenes. You can also rearrange scenes with drag and drop.
Method A
One way to create an novel outline is to create a short description for each scene. The chapters can be used to hold the scenes that occur within a given time frame. For example one chapter may contain the scenes that occurred during that day.
Select the Outline icon on the left-hand-side.
Double-click on a chapter or scene in the Title column to edit the name.
From left to right the first three icons at the bottom of the screen perform the following functions:
- Folder with plus sign creates a new folder (chapter).
- Rectangle with plus sign creates a new text page (scene).
- Minus sign deletes currently highlighted folders and pages.
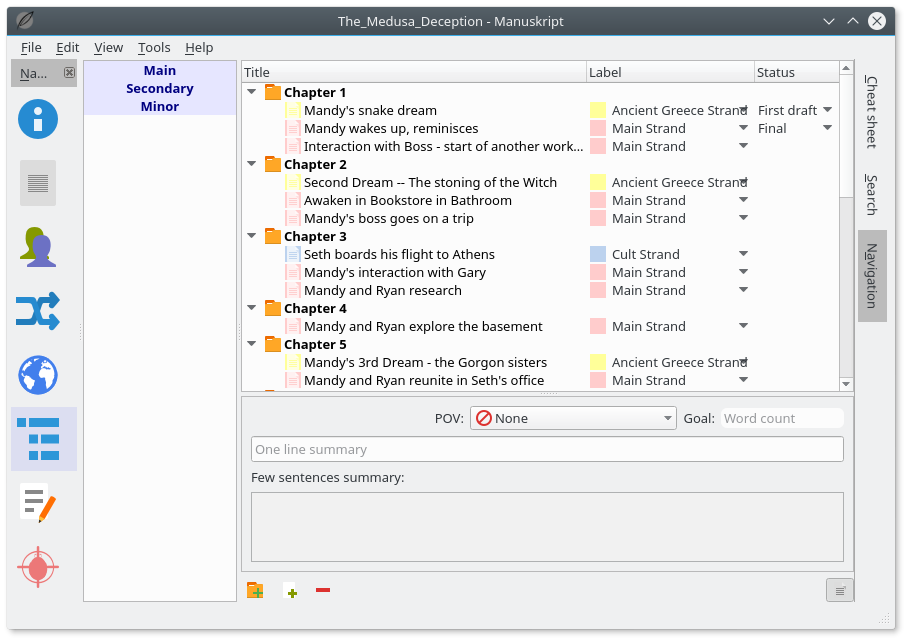
Note that the above view had several visible columns disabled using Edit -> Settings -> Views -> Outline -> Visible columns.
Method B
Another way to create an outline is using the Editor pane in Index cards view mode. The chapters might describe events that occur in your story. For example in the chapter index card a one line summary might indicate a major plot point, and a full summary might list the events for that plot point.
Select the Editor icon on the left-hand-side.
Click near the top of the index card to enter a one line summary. Click lower in the index card to enter a full summary.
The set of icons directly below the Editor pane perform the following functions:
- Circle with up arrow navigates to parent element.
- Rectangle displays the text of the entire novel.
- Four square boxes displays the index cards.
- Three dots and bars displays the outline.
- Horizontal slider grows and shrinks the size of the index cards.
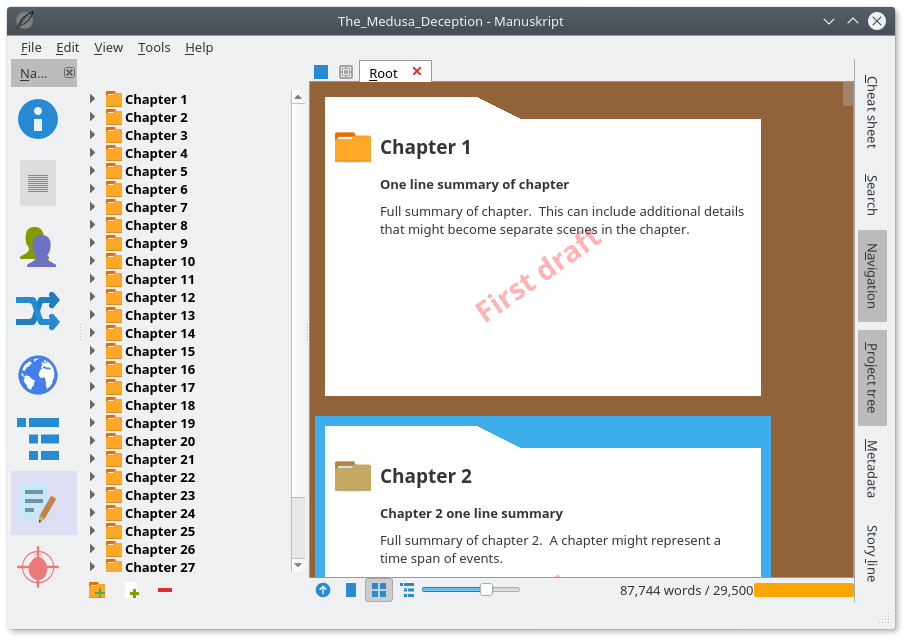
Note that the above view had the size of the index cards increased by dragging the slider beneath the Editor pane.
Characters
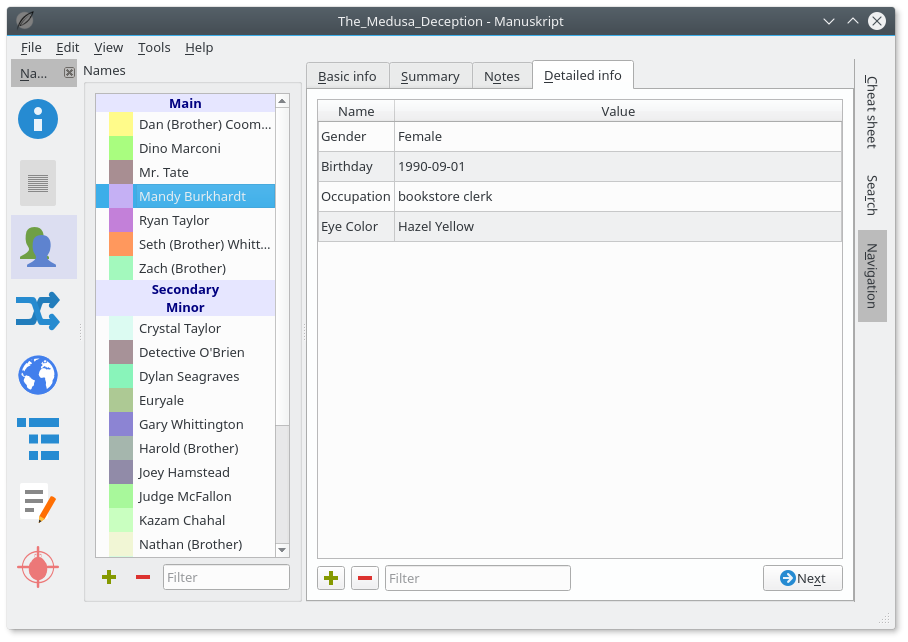
The Characters pane enables you to create characters, capture their goals and motivations, and add more detailed information. This can help maintain consistency by tracking attributes such as a character's eye colour to avoid having blue eyes in one scene and brown later on.
Some writers like to begin by creating the characters before outlining the story. Some prefer the other way round. Manuskript supports both approaches. You simply click on the left-hand-side icon that you wish to work on next.
Select Characters icon on the left-hand-side.
Settings
You can change the look and feel of many features in Manuskript.
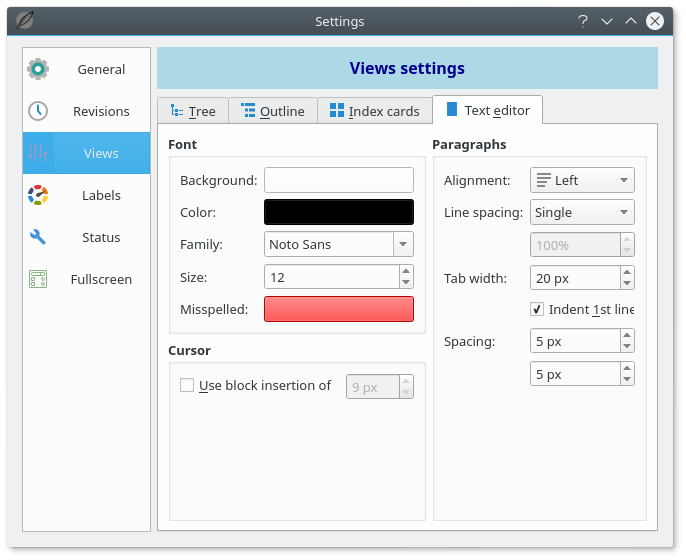
Settings such as fonts, alignment, line spacing, and tab indent will change the look of text in the Editor pane. Similar Fullscreen settings will change the look in distraction free full screen mode. These settings do not affect the compiled export format covered later in this tutorial.
For example to increase the font size, select Edit -> Settings to open the Settings window.
In the Settings window select Views on the left-hand-side, click Text editor and increase value of the font size.
Labels
Labels can help you organize your work.
Labels might be used to track strands in a story. A strand is one of different aspects of something. For example a strand might indicate character development, or it might represent an evolving plot or sub-mystery.
These strands can be highlighted in other areas using colour coded labels.
Create Labels
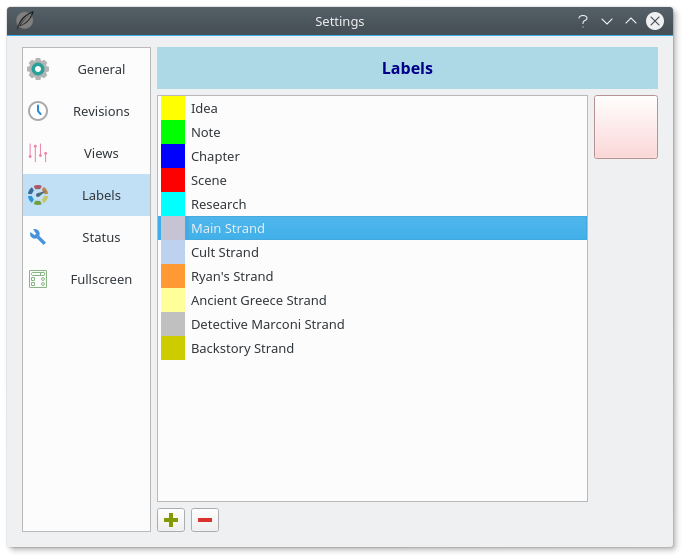
Select Edit -> Settings to open the settings window.
Click Labels on left-hand-side to show the current list of labels.
Use Plus icon to create new labels, and Minus icon to remove labels.
Show Label Colors in Navigation Tree
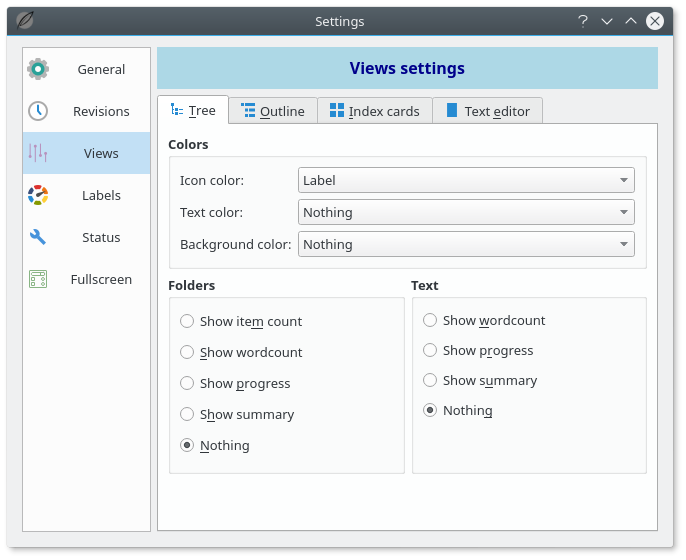
You can configure Manuskript to display the label colour in the Editor pane navigation tree scene icon. This can be useful so you can at at glance recognize similarly coloured scenes.
Select Edit -> Settings to open the settings window.
Click on Views on the left-hand-side.
Click the Tree tab.
Change Icon color to Label.
Editor
The Editor pane is where you will spend most of your time telling your story.
Select Editor icon on the left-hand-side.
The editor supports the normal set of editing operations:
- Ctrl+X to cut
- Ctrl+C to copy
- Ctrl+V to paste
- Ctrl+Z to undo
- Ctrl+Shift+Z to redo

Compile and Export
There will come a time when you wish to share your work-in-progress with a critique partner, agent, or publisher. This can be accomplished by exporting your work into a different format, such as MarkDown, or HTML. Additional formats such as ePub, OpenDocument, and DocX are available if you also install pandoc.
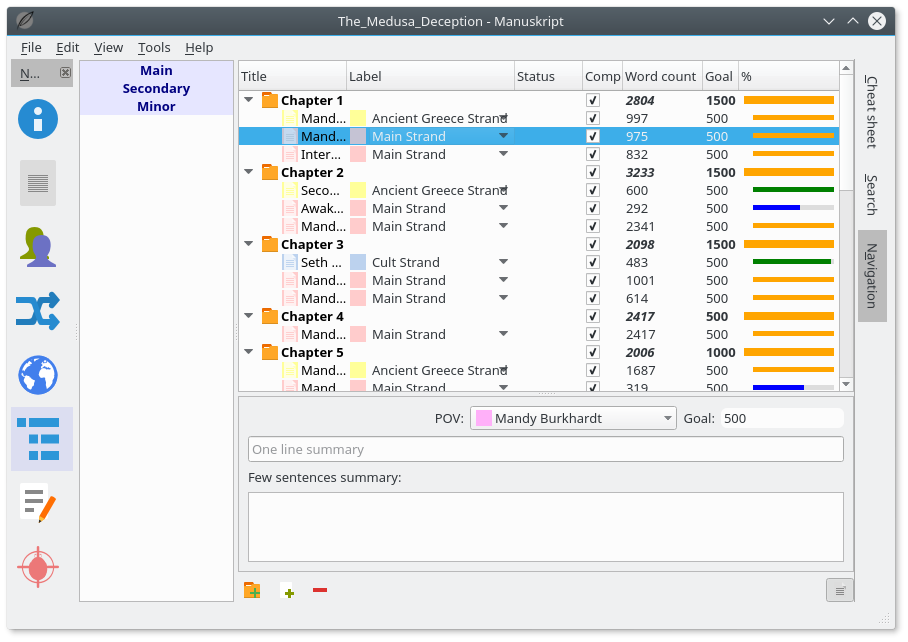
By default all chapters and scenes are included when you compile your project into an export format. You can de-select the Compile check box if you wish to exclude a section. These settings can be readily seen in the Outline pane.
Next select Edit -> Compile, choose an Export to format, click Export, and the folder and name for your export file. Preview is available for some export formats.
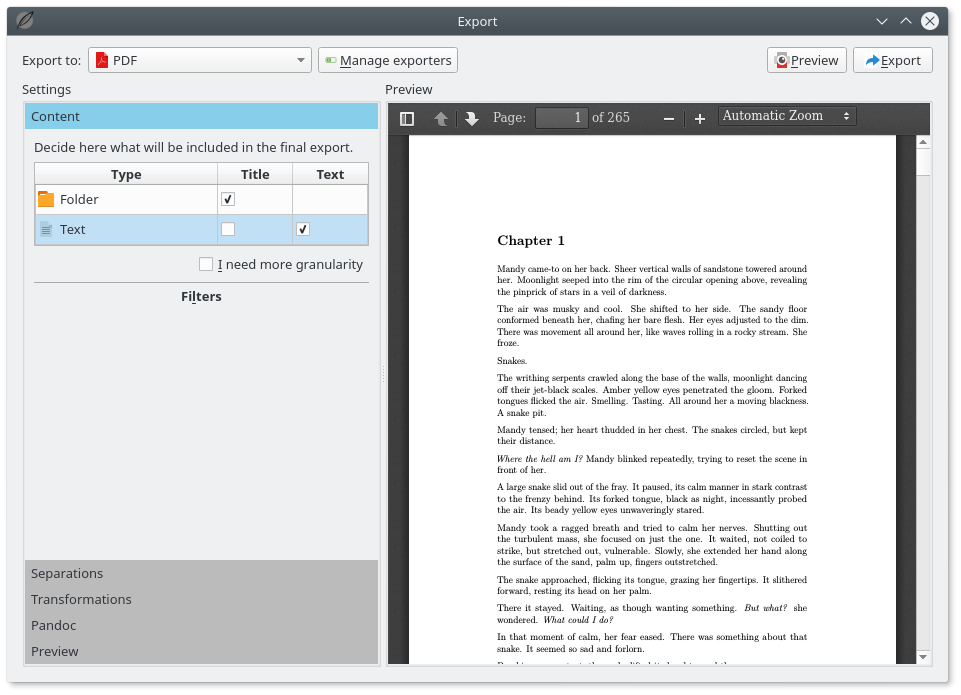
Note that if you use a format like OpenDocument or DocX then it can be helpful to open the document in a word processor and enable track changes mode so you can see any changes a collaborator might make.
Tips
Following are several additional tips on using Manuskript.
Basic
-
Toggle spell check activation with Tools -> Spellcheck menu. Select language dictionary with Tools -> Dictionary menu.
-
Set word goals in the Outline pane.
-
View actual word count in the Editor pane.
-
Access distraction-free mode by clicking on the diagonal arrows icon in the lower right-hand-corner of the Editor pane. Press Escape key to exit.
-
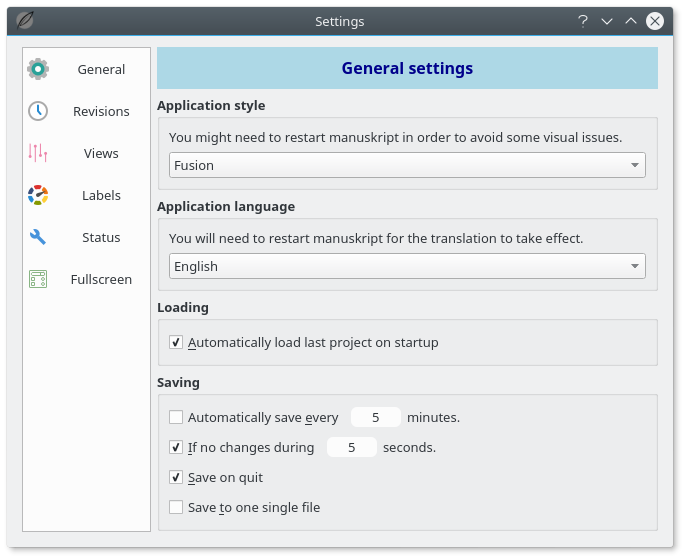
Enable automatic loading of your project by enabling general setting Automatically load last project on startup check box.
Advanced
-
To force Manukript to store chapters as folders and scenes as text files in your computer's file system, de-select the general setting Save to one single file check box. This can be useful to enable editing the scene text files with a different text editor, or the use of a revision control system like git. Be sure to not have Manuskript open at the same time otherwise conflicts can arise.
-
If you wish to create ePub and mobi formats you might consider EBookGenTools scripts to help automate the process.
Conclusion
Congratulations on learning the basics of how to use Manuskript to write your novel. Manuskript can also help with creating a summary, tracking plots, and building worlds. We hope you enjoy crafting your masterpiece with Manuskript.
Best wishes with your creative writing endeavours.
References
A big thanks goes to author Linda Temple for permitting the use of her novel The Medusa Deception in the screen shots in this tutorial.

